In addition to an extensive online gallery of models, Alice 2 also lets you import 3D models saved out as ASE (ASCII Scene Exporter) files.
From the "File" menu select "Export". From the "Save as type" dropdown select "ASCII Scene Export", give the file an appropriate name, and hit "Save". Make sure when you save out the model that you keep the texture in the same directory. When Alice imports the ASE file it will look in the same place for any textures the model may need. You should be able to export this file format from other 3D modeling software.
When the export dialog comes up, make sure all of the "Mesh Options" are checked and hit OK. This may vary depending on software and version.
Under the "File" menu, select "Import". Make sure you select "ASE" from the "Files of type" dropdown. Navigate to where you exported your model to, select it, and hit "Import".
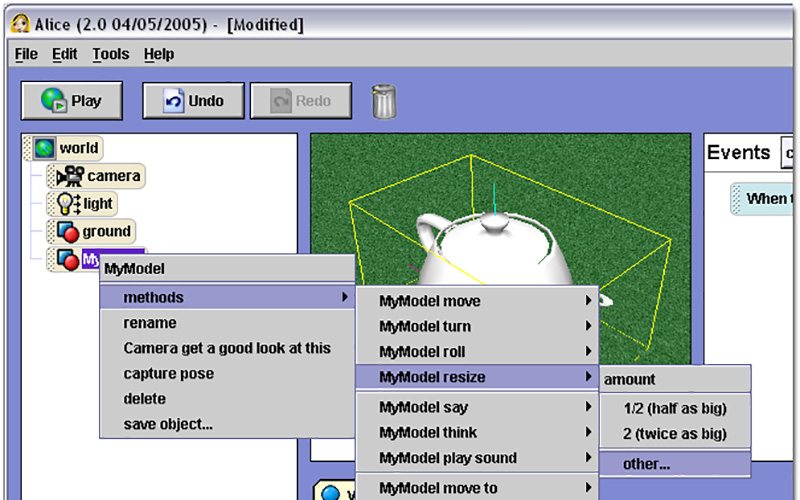
When the model imports, you'll probably want to get a better look at it to see how it looks in Alice. Right-click on the model in the model tree and select "Camera get a good look at this". This will frame the object in the middle of the view and zoom out as necessary.
If the model is too big (a common problem since 3D Studio uses different units from Alice), simply use the "resize" method to shrink it down. Resize it by about 1/2 until it's the size you need it for your scene.
That's it! Now you can use it just like any Alice model. Go ahead and save it out as an A2C file so you won't have to import it again.


